Shooting in low light conditions can be challenging, but with the right techniques and equipment there’s little reason why you shouldn’t be able to effectively hit your targets. Whether you’re a seasoned marksman or new to the sport, there are a variety of things that you can do to improve your accuracy, even when the lighting is less than optimal.
For the purposes of this edition, we’ll stick with hunting. We’ll leave low light pistol or tactical shooting for another time. Now it’s no surprise that shooting with less light will be somewhat tougher than the reverse. Although your shooting fundamentals remain the same for the most part, it really all comes to what you can and can’t see. An earth-shattering concept, I know. It’s a different ball game for sure, but the issues presented are not insurmountable by any means.
To set some context for what ‘shooting in the dark’ means exactly, we would need to address the rules and regulations that each State and/or local jurisdiction have in-place. All States will have a set of  standards that need to be strictly adhered to when it comes to hunting in general, and what is and isn’t allowed at night. As a conscientious hunter, it would be your responsibility to fully comply. Also be aware that these rules and restrictions can change over time, so it would serve you well to stay on top of what’s current. Having your licensing and permits up-to-date would also be a given.
There will be some exceptions here, but generally, hunting game animals in total darkness is not allowed in most areas. This would include deer, elk, moose and turkeys. Typically, you can hunt game legally a half hour before sunrise to a half hour past sundown. Animals are normally pretty active during these buffer periods, so it can be an ideal time to be out there anyway.
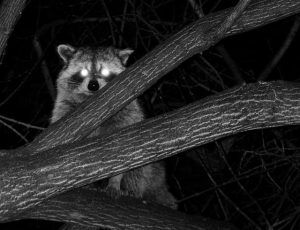
Fur bearing, non-game animals can be hunted in certain areas at night and would include racoons, possums, foxes and rabbits. Smaller varmints like prairie dogs and squirrels in addition to some types of predators may also be legal. Again, this would all need to be confirmed for the area that you’re hunting within. Also be aware of any rules around the guns that you can use, the ammo type and the caliber.
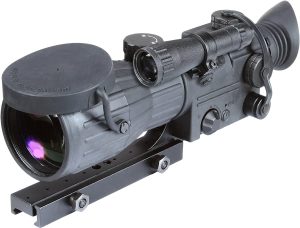
When it comes to the equipment that you can use to make night hunting easier, there‘s a lot available on the market to choose from. This would include a wide variety of lamp kits and laser sights in addition to night vision goggles, binoculars, monoculars and scopes. Thermal imaging and infrared (IR) equipment is also very popular. The downside is that the use of some of these types of items can be restricted or prohibited depending on where you live.
The main issue with restrictions arises in relation to whether your target is ‘illuminated’ by the light/device, or in other terms, does the light ’project’ onto it. This would also technically include IR (although you can’t actually see it). Thermal is a popular option since it doesn’t require the use of light. A thermal scope works well since you’ll be able to smoothly transition from day to low light or night  hunting with little to no adjustments being necessary. Where allowed legally, many hunters opt for a red or green light beam to avoid spooking animals and the potential eye fatigue that can be caused by white light. Be sure to check the local and state laws to know for sure what you’re able to use.
Some Other Things to Consider
Be sure to scout your hunting area beforehand to get a good understanding of trails and where animals congregate. This will also give you a chance to determine where natural lighting may be best at certain times of the day.
Hunting in low light conditions can be dangerous if you’re not familiar with the landscape. This is another good reason to check things out ahead of time. Be aware of any obstacles or hazards, waterways, poor footing, steep drop-offs or nocturnal predators that may cause you issues.
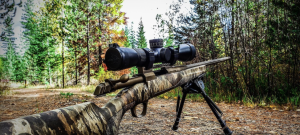
You should always use the best optics that you can afford in any case, but for low light shooting it becomes even more important. Look for scopes with a large objective lens and high-quality coatings that will gather and transmit light more effectively. A variable magnification feature is always helpful as well as an illuminated reticle in red, green or blue. These are particularly effective at dawn and dusk.
Tracking and hunting at night can increase adrenaline and create a feeling of added pressure as you shoot. It’s important to be patient and focus on proper fundamentals when opportunities present themselves. This includes stance, breathing, sight picture and follow-through.
The human eye takes some time to adjust to poor lighting conditions, and even once your pupils do adapt, our night vision is only so good. It’s normally a good idea to anticipate your transitions from light-to-dark to help minimize the effects. Here are a few tips:
- It’s common to wear a billed baseball cap, pulled down tight over your eyes, to block out bright daylight and reduce glare
- Try wearing sunglasses to help condition your vision for lower light situations. This is a good way to effectively reduce the adjustment time once you transition.
- Avoid switching your gaze from bright to lower light to help minimize the adjustment process. It may mean the difference between taking advantage of a good shot opportunity and not.
- One technique that has proven effective is to move your eye off your intended target by a few degrees to keep it in better focus. This ‘off center’ approach engages your peripheral vision more and can reduce the blur effect that can happen when staring straight at your target in low light.
- Like any technique, it’s important to test your equipment and practice your shots under various light conditions to ensure accuracy and consistency.
Shooting in low light or after dark may present some challenges, but with the right equipment and discipline it can be a very rewarding experience. Just be sure to have a complete understanding of what your State or local area will allow.
Sign up for K-Var’s weekly newsletter and discounts here.

Leave a Reply